How do I map a network drive in Windows?
SOMFiles is a network-attached storage device that hosts a large amount of a data. It's accessible from any computer on campus or otherwise connected to the SOM network. In most cases, the folders relevent to your and your department appear on your computer as a drive letter. This is called being mapped. This article shows you how to map a network drive in cases where it is not automatically mapped.
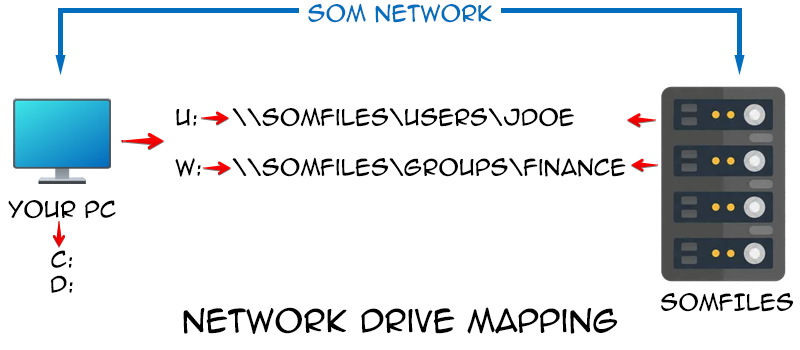
Here's how a mapped drive works. Your computer assigns drive letters to its local hard drive(s), which are C:, D:, etc. Additional drive letters can be assigned to represent folders that exist on other devices, such as SOMFiles. Whereas the C: drive is always available, mapped network drives are only available as long as you are connected to the SOM network, meaning your computer is physically on campus, or you are connected to an Azure Virtual Desktop. The drive letter that a folder is mapped to is actually arbitrary, although there are standards we adhere to, such as your user drive being U:.
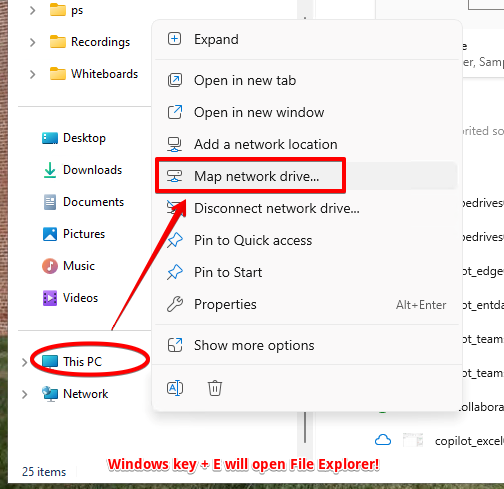
The quickest path to map a network drive is through File Explorer. File Explorer is simply the window you see when any folder is open. A shortcut to open File Explorer is by pressing the Windows key and E. Right-click the This PC icon and choose Map network drive...
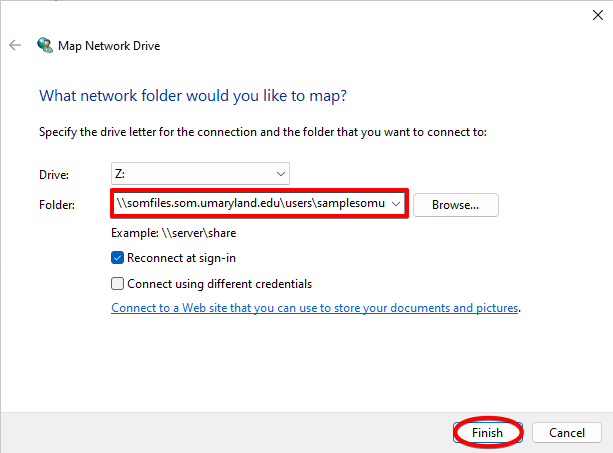
Now type or paste the file path, choose which drive letter you want to assign (this is arbitrary, you can use any letter you like), and click Finish.
If you don't know the full path of the folder you're trying to map, you may be able to browse to it. In this case, type \\somfiles.som.umaryland.edu into the folder box, and click Browse.
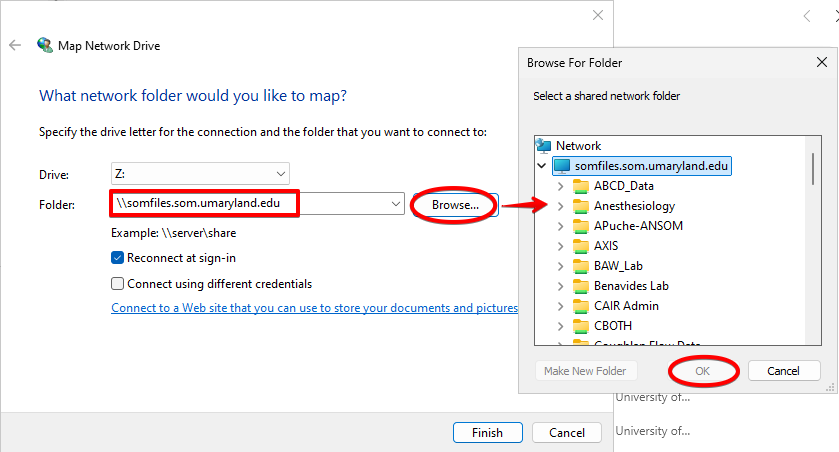
Find your folder and click OK. While browsing, you'll notice that while you can see many folders, you can only open the folders that you have access to. In some cases, you may have access to a specific folder, but not its parent folder (the folder that it is in). When this is true, you cannot use this method of mapping a network drive, and would instead need to specify the exact file path as in the first example.
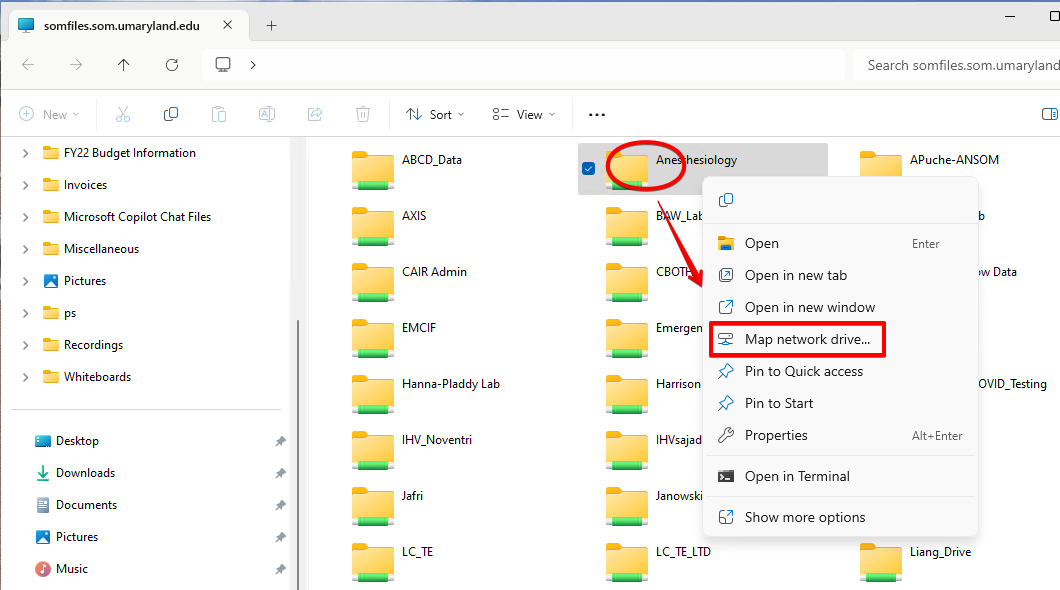
Another method of mapping a network drive is to locate the folder itself. Right click on it and choose Map network drive... This will take you to the window that we've seen in the previous example, so that you can choose your drive letter, but now the file path will be filled in already.
If you're unsure how to access the network folders on SOMFiles directly, you can use the Run command. This is also helpful if you just want to access the files quickly without mapping the drive, or if you want to verify that you have access to the files.
Right click on the start icon and choose Run. Alternately, you can press the Windows key and the R key. Paste or type the file path, and click OK.

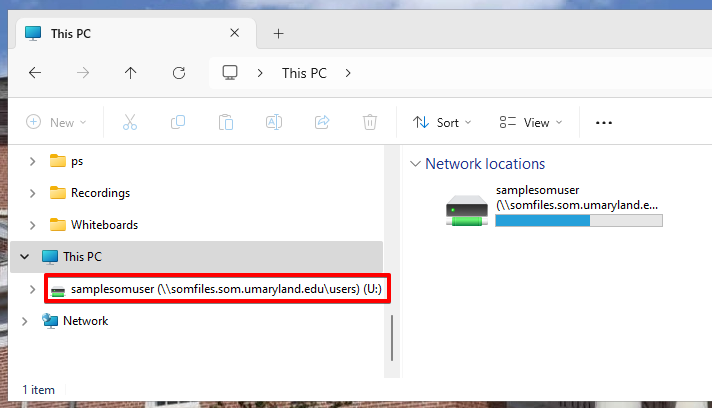
Once mapped, your drive will appear under This PC.
Common file paths for mapped drives are:
U: Drive \\somfiles.som.umaryland.edu\users\%username%
V: Drive \\somfiles.som.umaryland.edu\groups\groupname
W: Drive \\somfiles.som.umaryland.edu\groups\InterDeptShares\projectname
Related articles:
